EVERYTHING can be taught in a school garden
If you haven’t heard me say it before, it is worth repeating that literally EVERYTHING can be taught in a school garden! And that includes abstract and complex topics like the extreme environment of outer space, along with how our survival as a species depends on interplanetary space travel!
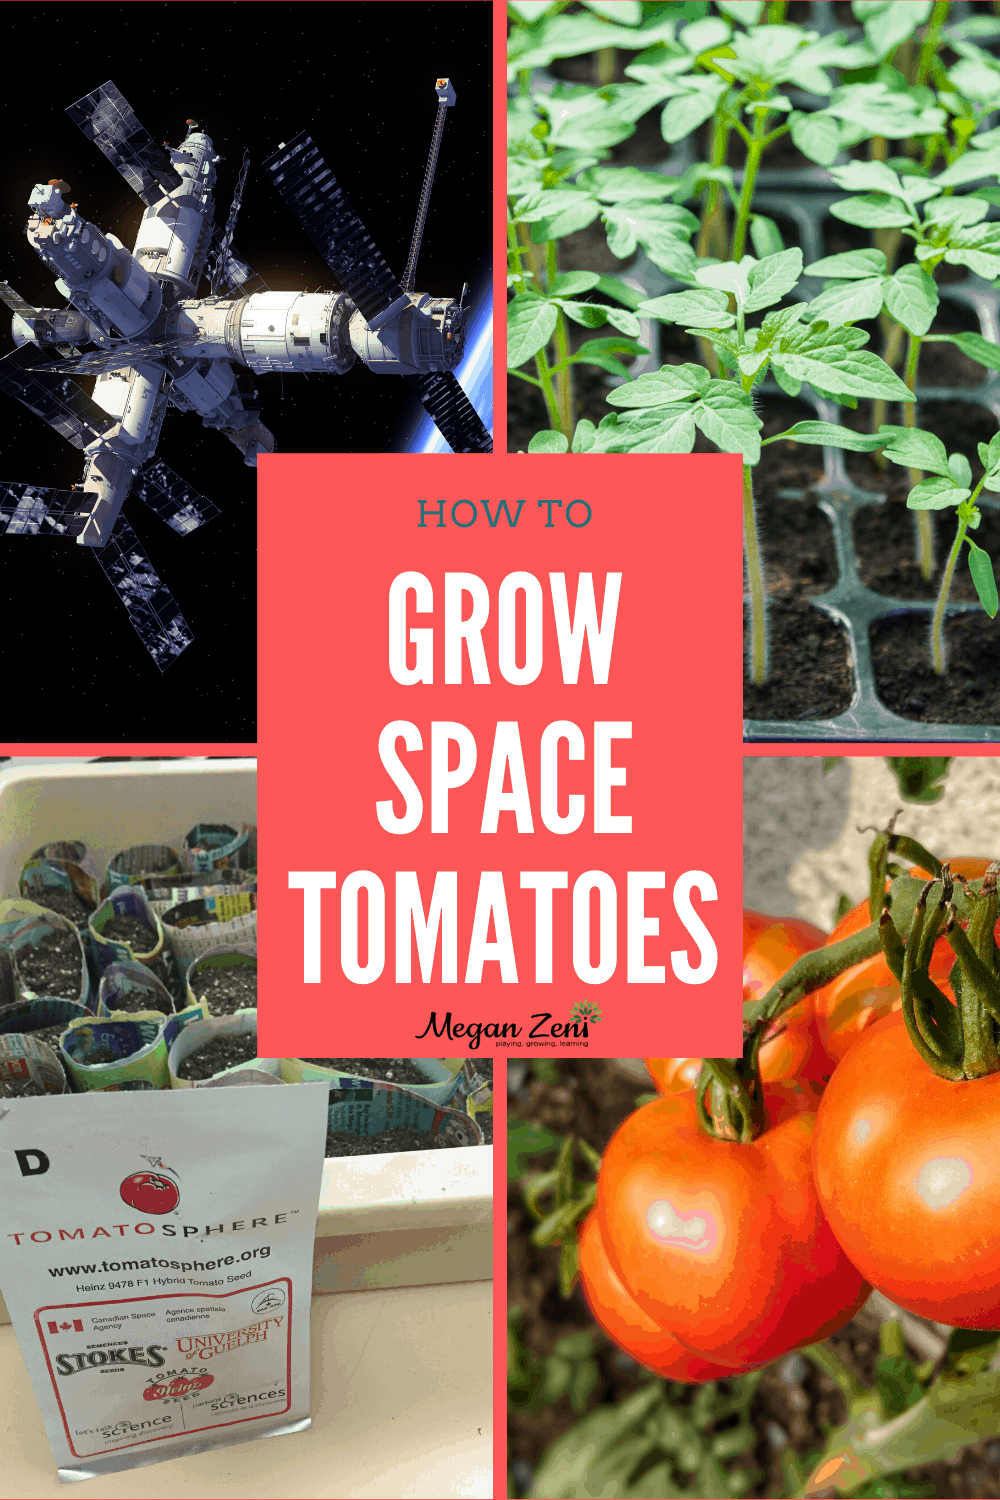
These ideas can be explored and investigated in your school garden through a free program for Canadian schools that invites K-12 students to consider growing space tomatoes with the Tomatosphere project. This scientific inquiry is a joint project by the Canadian Space Agency, The University of Guelph, Let’s Talk Science, Stokes seeds, and Heinz tomatoes. Together they are collaborating with kids from across the country to study the effects of extreme environments, and the harsh conditions of re-entry on seed germination.
The research question we are tasked with collecting data for is: How does exposure to the space environment, or space-like conditions, affect the number of tomato seeds that germinate?
How the Tomatosphere project works
Teachers can sign up to join the project here.
Once you have completed the super simple enrolment form you will be sent two envelopes of seeds. One of those seed packages will have been to the International Space Station, and one will contain the control seeds, that have remained on earth.
Your job, as a citizen scientist, is to conduct a controlled experiment with your students by observing, recording, and reporting the germination data back to the space agency scientists. You will not know which seeds went to space until you report your data, which means your students will have an opportunity to engage in scientific thinking like predicting and hypothesizing which seeds are the space tomatoes!
This inquiry is unique in how it involves students from across Canada to help scientists learn more about space farming! How cool is that? Here is a great video for your students to watch explaining the project… from space!
Tips for a successful Tomatosphere project
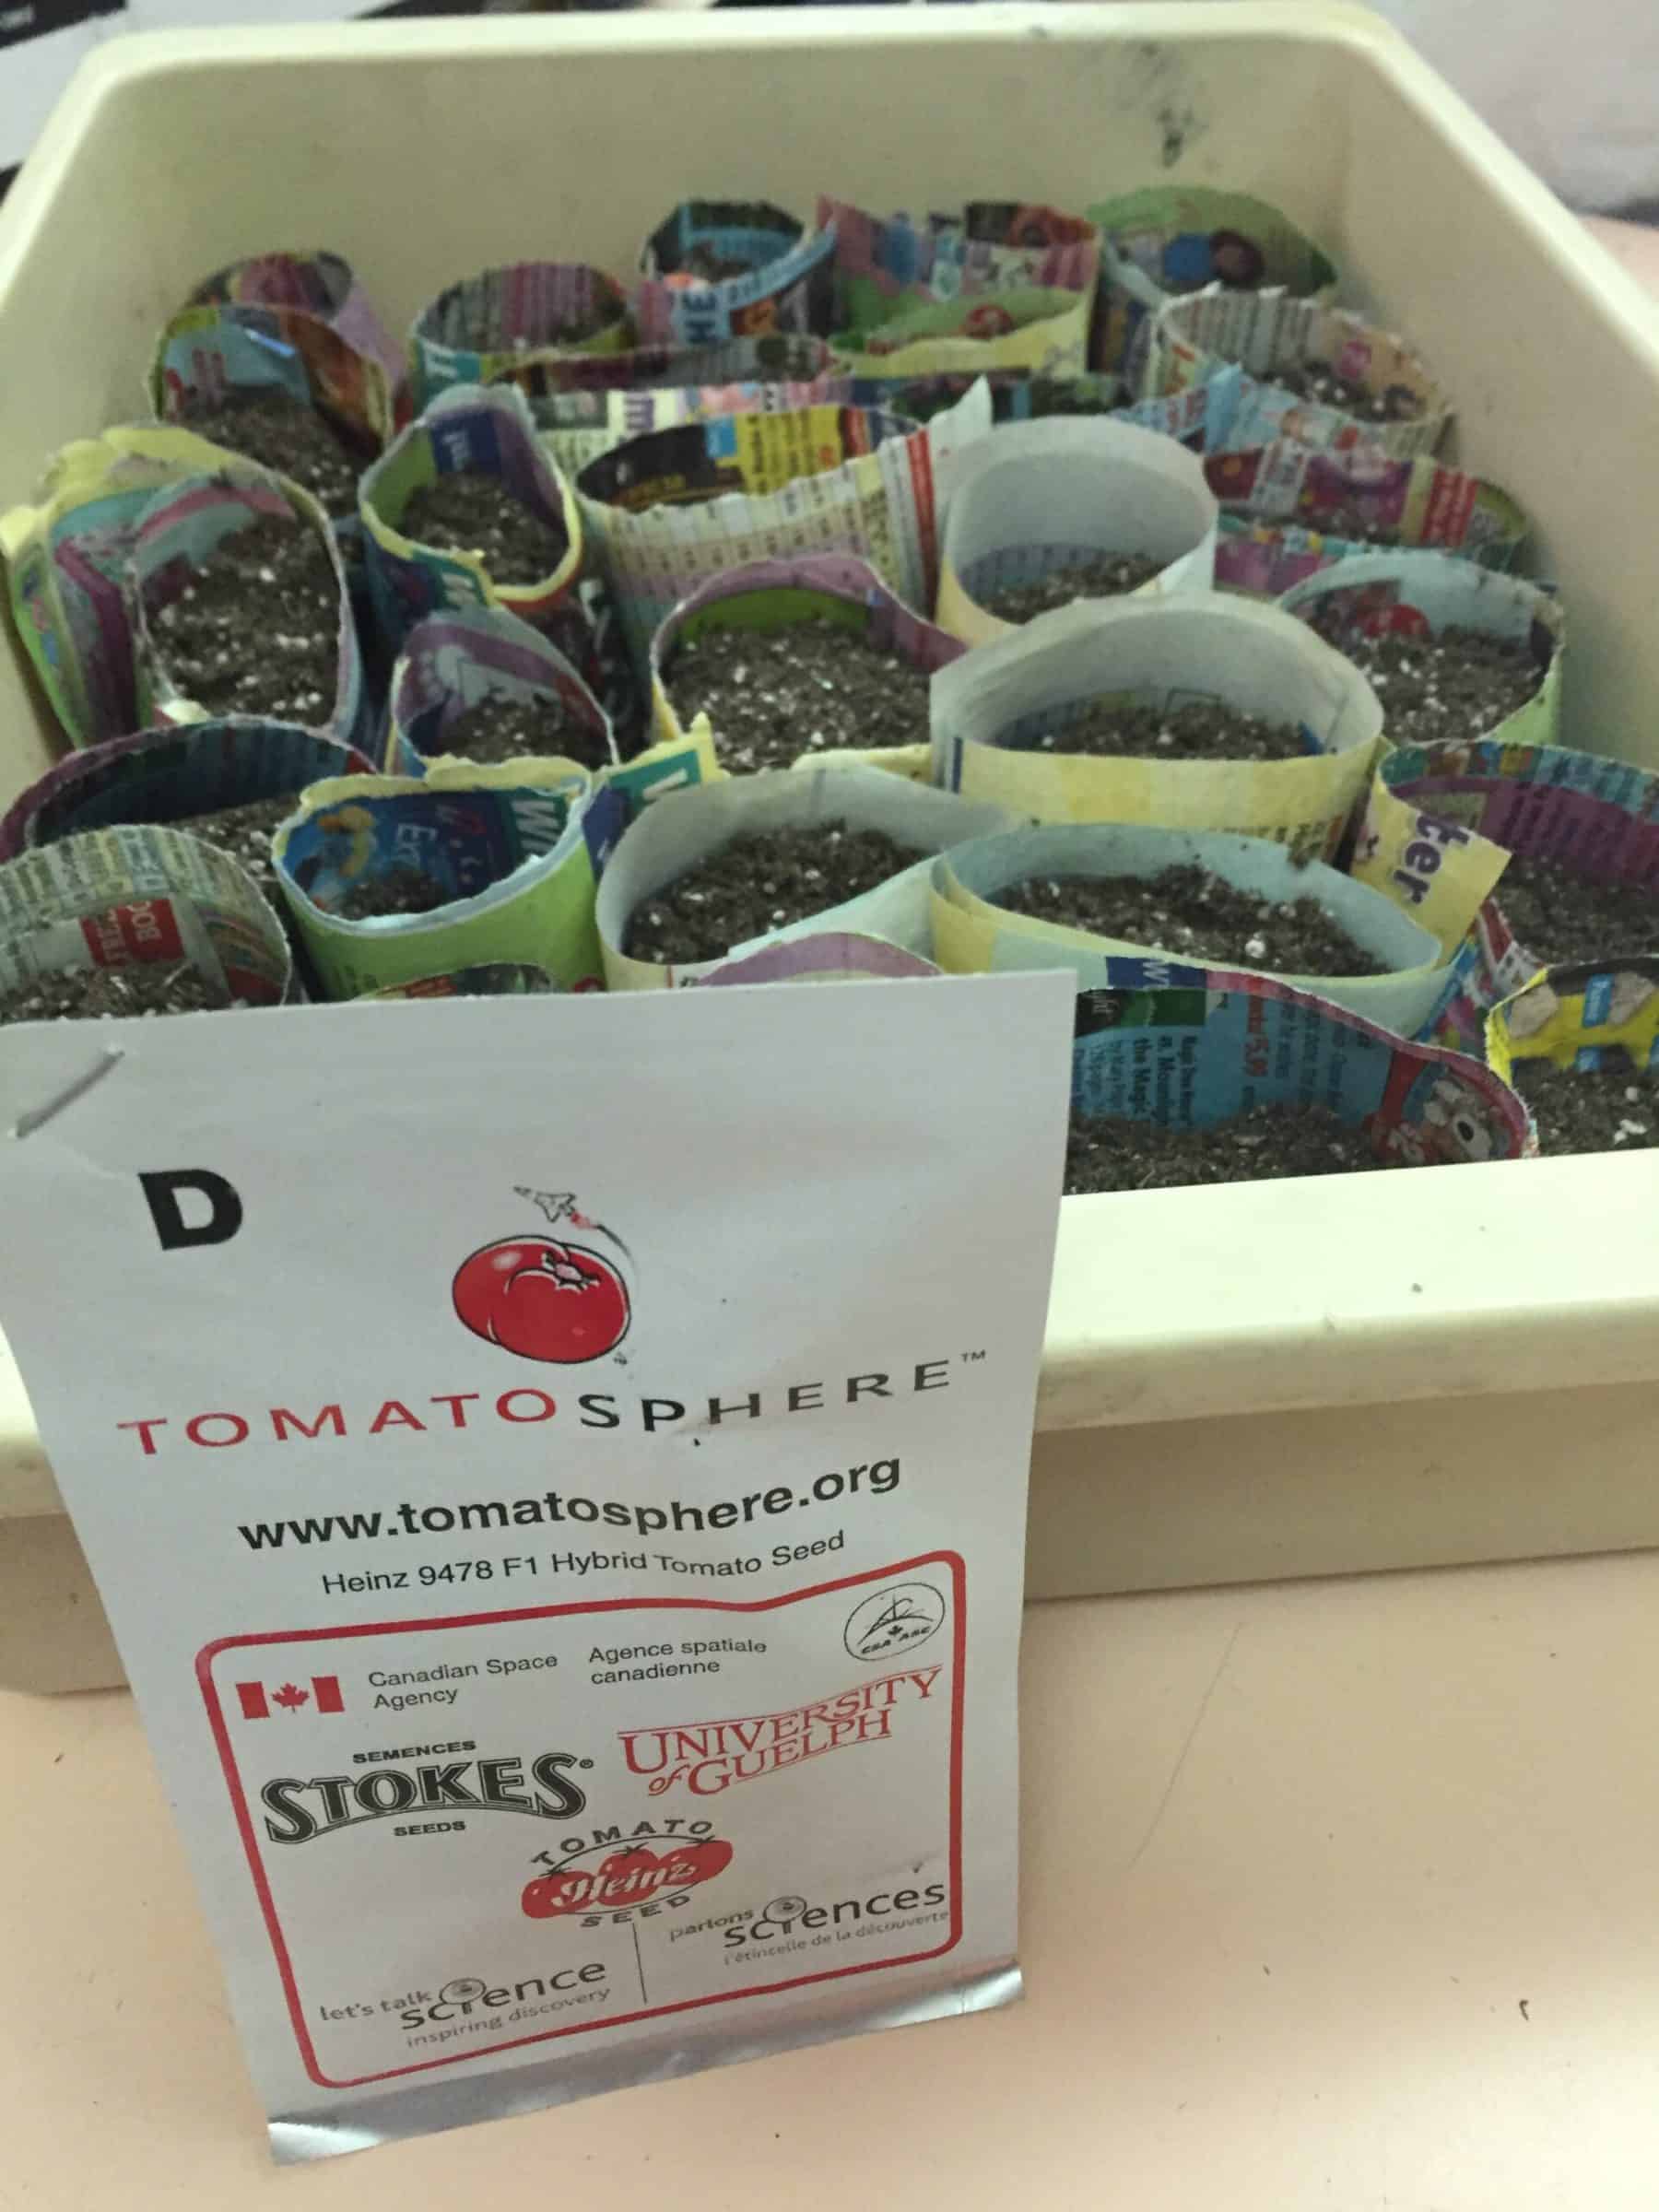
I find it best to plant the seeds in paper pots that we have prepared specifically for this project.
Tomatosphere’s promotional materials recommend peat pellets, but I do not promote peat pellets for several reasons: first of all they are expensive, and with limited school garden budgets they are not going to improve your germination rates, or experience of growing the seeds.
Secondly, the plastic mesh that is used to contain the swollen peat reportedly takes up to two years to decompose in your garden beds.
Do you really want to be adding plastic mesh to your organic garden beds? And perhaps most importantly, peat is a finite resource, and our local peat bogs act as carbon sinks, which means they have an important role to play in controlling and mitigating climate change.
Peat is an unnecessary material to harvest for seed starting and we have a collective responsibility to make purchases that deter peat harvesting.
In my experience, paper seed pots are the most efficient and effective way to start seeds with students. You can read more about how we make our own paper pots for seed starting here. It is also totally suitable to use up-cycled plastic pots from other garden purchases for this project. Either way, I recommend separating your seed starting pots into two trays, and then only planting the seeds from one Tomatosphere envelope in one tray to keep your results as straight forward as possible.
Make sure the study results stay accurate
To keep the study results accurate, it is important that both sets of seed trays receive the same amount of water, sunlight, and temperature.
Tracking your progress
You’ll want to keep track of how many seeds you received in each package.
There are usually between 20-30 seeds in each envelope so one or two tomato seeds can go in each paper pot, depending on how large your container for them is. It is important to record the number of seeds you planted for each data set. Students can record germination progress day to day in a gardening journal, or use photographs to create a time lapse video.
Here is a printable observation sheet you can download and use with your students.
Tomatosphere project planting tips
Planting your seeds on a Wednesday or Thursday means the seeds will have time to germinate for observation the following week. Expect seeds to take 7-14 days (or more!) to emerge from the soil. If you have a seed starting heat mat or grow lights, they will improve germination speed for your seeds, but they are not necessary. You can simply place your seed trays on a secure surface with access to light.
Depending on your building orientation and window quality, window sills are not actually the best place for seed trays. If the sunlight is too direct or intense, the seeds might dry out and, for seed germination, dry is death! Likewise, if you are leaving them unattended for a weekend at school, don’t plan to plant them before a long weekend, or you will return to very dry and dead seedlings.
On a Friday afternoon, make sure the seed trays are very wet before you leave for the weekend, and water them again first thing Monday morning. Or take them home to keep them damp. Dry soil is bad news for germinating seeds.
The temperature in window sills can also fluctuate widely which is also not great for seed germination. Keep the seeds in a space where the temperature is constantly warm and the seedlings have access to light. If you notice your seedlings are leaning heavily in one direction, they are light seeking and the tray should be rotated to allow the stems to strengthen.
It is also a good idea to move your seedlings into more light if they are starting to look “leggy” this means the stalks are very long and there is not much leaf growth on the plant.
Required materials
Tomatosphere seeds- order them here
paper seed pots- read how to make them here
Optional materials
Why grow space tomatoes?
This is an incredibly engaging and exciting way to ignite a curiosity and interest in space travel for kids of all ages all while teaching your students how to conduct a controlled experiment. You can read more about how to conduct a controlled experiment here.
Reporting Results isn’t Rocket Science
Once our seed tomatoes have germinated we report our results to the project. You can report your findings here. The first time I enrolled in this project, I was dreading the reporting process, certain it would require some NASA level math! I assure you that you simply have to record how many seeds were in each package to start, and how many actually germinated.
Once you submit the results you will receive an email, almost immediately, revealing which seeds were, in fact, your space tomatoes! We continue to fertilize and care for our seedlings after the project is completed, and when they have grown sufficiently for transplanting, we place them in our school garden.
The species of tomato seed in this project is a Roma tomato, which is harvested in the fall. So, if you can work with your school community to keep the garden watered through the summer, you’ll return to a bumper crop of space tomatoes in the Fall!
Tomatosphere project resources
The Tomatosphere website has a mountain of resources for teachers on inquiry learning, the scientific process, and sharing data. Click here to go to their resources page.
They also have an extension page for inquiries beyond the project, like how much water is in a tomato and how, exactly, a seed germinates. You can access these resources here.
Interested in other curated ways to engage kids in garden learning? Check out these Pinterest pages.